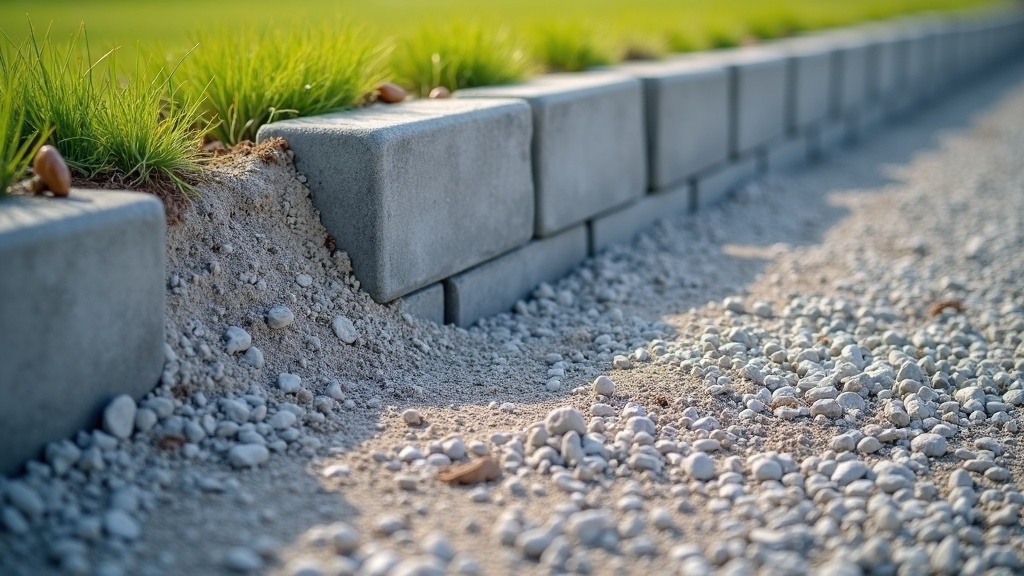
Learn how to backfill retaining wall with gravel correctly to prevent hydrostatic pressure, wall failure, and drainage problems. This guide covers gravel types, depth requirements, pipe placement, and common mistakes to avoid for any retaining wall project.
Table of Contents
- Why Gravel Is the Only Choice for Retaining Wall Backfill
- Gravel Specifications: Size, Type, and Depth Requirements
- Step-by-Step Process to Backfill a Retaining Wall with Gravel
- Drainage Pipe and Weep Systems in Gravel Backfill
- Frequently Asked Questions
- Gravel Types for Retaining Wall Backfill: A Comparison
- Practical Tips for a Successful Backfill Project
Backfill retaining wall with gravel using clean, angular crushed stone in a zone at least 12 inches wide. This open-graded material allows water to drain freely, relieving hydrostatic pressure that would otherwise push the wall outward. A perforated drain pipe at the base carries water away, and proper compaction in lifts prevents settling.
Quick Stats: Backfill Retaining Wall with Gravel
- Minimum gravel backfill zone width: 12 inches (How to Hardscape, 2024)[1]
- Recommended stone size for backfill: 0.75–1.5 inch graded stone (Gravelshop, 2025)[2]
- Drain pipe slope: 0.125 inch of fall per foot of pipe (How to Hardscape, 2024)[1]
- Gravel placement: 4 inches per lift for proper compaction (Gravelshop, 2025)[2]
Introduction
To backfill retaining wall with gravel is not just a recommendation – it is an engineering requirement. When soil gets saturated after heavy rain, it expands and exerts tremendous lateral pressure against the wall. Without a properly designed gravel backfill zone, this hydrostatic pressure can cause cracking, bulging, or complete wall collapse. The gravel creates a drainage path that allows water to escape before pressure builds up. This article explains the exact gravel specifications, installation techniques, and drainage systems needed to ensure your retaining wall stands for decades.
Why Gravel Is the Only Choice for Retaining Wall Backfill
Gravel is the preferred backfill material for retaining walls because it solves the fundamental problem of water management. Unlike compacted soil, which traps water and turns into a heavy, expanding mass, clean gravel allows water to flow freely downward to a drain pipe. This principle is critical for any wall over 3 feet tall, where hydrostatic pressure can reach thousands of pounds per square foot.
Understanding Hydrostatic Pressure
When rain saturates the soil behind a retaining wall, water fills the pore spaces between soil particles. This saturated soil weighs significantly more than dry soil and pushes against the wall with increasing force. The gravel backfill zone interrupts this process by providing a low-resistance path for water to drain away. As Mike Day, concrete contractor and owner at Day’s Concrete in Maine, explains: “When you’re building a retaining wall, using a free-draining gravel backfill is critical. It relieves hydrostatic pressure so the wall isn’t forced outward every time the soil gets saturated” (How to Hardscape, 2024)[1].
How Gravel Drainage Works
The open spaces between angular gravel particles create continuous channels for water to travel downward. This is why rounded pea gravel or river rock is less effective – the particles pack together more tightly, reducing the void space. Angular crushed stone, typically ASTM #57 or similar graded material, maintains approximately 40% void space, allowing water to move freely. Scott Bower, landscape contractor and founder of How to Hardscape, recommends: “A 12-inch zone of clear, angular stone behind the wall is the minimum you should be aiming for. That open-graded gravel is what allows water to move down to the drain pipe instead of building up pressure behind the wall” (How to Hardscape, 2024)[1].
Gravel Specifications: Size, Type, and Depth Requirements
Selecting the right gravel for a retaining wall backfill project requires attention to three key specifications: stone size, angularity, and zone width. Using the wrong material can compromise drainage and lead to wall failure.
Recommended Stone Size
The Gravelshop Technical Team states that for the backfill zone behind a retaining wall, “¾ to 1½ inch graded stone performs best. It stays open enough for water to travel downward to a drainpipe or weep system while still providing structural support” (Gravelshop, 2025)[2]. This size range, roughly equivalent to ASTM #57, provides the optimal balance of void space and structural stability. Smaller stones like pea gravel (3/8 inch) may not drain as effectively because they can compact more densely. Larger stones (2 inch or more) may create voids too large for proper compaction, leading to settlement over time.
Why Angular Stone Matters
Angular crushed stone interlocks better than rounded gravel, providing more stable support for the wall while maintaining open drainage channels. Rounded gravel from riverbeds tends to shift and settle under load, which can cause the wall to move. For the base layer under the wall blocks, a crushed stone size of 0.75–2 inches is recommended to provide stability and leveling (Gravelshop, 2025)[2]. The base material should be compacted in lifts of 4 inches per lift to achieve uniform density (Gravelshop, 2025)[2].
Minimum Backfill Zone Width
The gravel backfill zone must extend at least 12 inches behind the wall face (How to Hardscape, 2024)[1]. For taller walls or areas with heavy clay soil, a wider zone of 18–24 inches is advisable. The total width of the base and backfill zone when constructing a typical modular block wall should be at least 18 inches of compacted aggregate extending under and behind the wall face (How to Hardscape, 2024)[1].
Step-by-Step Process to Backfill a Retaining Wall with Gravel
Proper installation of gravel backfill follows a specific sequence to ensure drainage and wall stability. Skipping steps or using incorrect techniques can lead to wall failure within the first few seasons.
Preparing the Base and Drain Pipe
Before placing any gravel, excavate a trench for the wall base that is at least 18 inches wide. Compact the native soil at the bottom of the trench, then add 6–8 inches of compacted crushed stone base. Level this base carefully, as it determines the alignment of the entire wall. Install a perforated drainage pipe along the base of the wall, sloping at 0.125 inch of fall per foot of pipe (How to Hardscape, 2024)[1]. The pipe should be wrapped in filter fabric to prevent fine soil particles from clogging the perforations.
Placing and Compacting the Gravel
As you build the wall blocks upward, backfill retaining wall with gravel behind each course. Place the gravel in 4-inch lifts and compact each lift with a hand tamper or plate compactor (Gravelshop, 2025)[2]. Do not dump all the gravel at once and then try to compact it – this will leave voids that later settle, causing the wall to sink. Continue this process until you reach the top of the wall. The top 6–12 inches of the backfill zone can be covered with topsoil for planting, but the gravel zone must extend all the way to the top of the wall to allow water to enter from above.
Outlet Connections and Weep Holes
For walls over 4 feet tall, the drain pipe should exit through the wall face at intervals of 50 linear feet of wall per outlet (How to Hardscape, 2024)[1]. These outlet “T” connections allow water to drain freely rather than building up inside the pipe. For shorter walls, weep holes can be drilled through the wall face at the base, spaced every 3–4 feet. The gravel backfill must extend to the weep holes to ensure water can reach them.
Drainage Pipe and Weep Systems in Gravel Backfill
The gravel backfill zone alone is not sufficient for tall retaining walls – it must be paired with a properly designed drainage system. The combination of gravel and pipe creates a complete water management solution.
Perforated Drain Pipe Specifications
A 4-inch perforated PVC or corrugated pipe is standard for residential retaining walls. The pipe should be laid in a bed of gravel at least 2 inches below the bottom of the wall blocks. The perforations face downward to collect water that has filtered through the gravel. The pipe must slope continuously toward an outlet, with a minimum slope of 0.125 inch per foot (How to Hardscape, 2024)[1]. For longer walls, consider multiple outlets or a larger diameter pipe.
Using Filter Fabric
To prevent fine soil particles from migrating into the gravel backfill and clogging it, wrap the entire gravel zone in filter fabric (geotextile). This fabric allows water to pass through but blocks soil particles. Install the fabric against the native soil before placing gravel, then fold it over the top of the gravel after backfilling. This is especially important in clay soils, which can quickly clog the gravel voids.
Weep Hole Systems for Block Walls
For segmental retaining walls, weep holes can be created by leaving vertical gaps between blocks or by drilling holes through the face. Each weep hole should connect directly to the gravel backfill zone. The Home Depot Editorial Team advises: “Plan to backfill the wall with well-draining gravel or sand. Higher walls or areas with soil that stays wet may need a drainage pipe” (The Home Depot, 2025)[3]. In regions with heavy rainfall, both a drain pipe and weep holes are recommended.
Frequently Asked Questions
Can I use pea gravel to backfill a retaining wall?
Pea gravel (3/8 inch rounded stone) is generally not recommended for retaining wall backfill because it compacts more densely than angular crushed stone, reducing void space and drainage capacity. The Hello Gravel Editorial Team suggests: “Use compacted crushed stone as your base under the wall blocks, then use pea gravel for drainage backfill behind the wall. This combination gives you both structural support and a reliable path for water to escape” (Hello Gravel, 2024)[4]. However, most contractors prefer angular stone for the entire backfill zone because it provides better drainage and structural interlock.
How deep should the gravel backfill be behind a retaining wall?
The gravel backfill zone should extend at least 12 inches behind the wall face (How to Hardscape, 2024)[1]. For walls taller than 4 feet or in areas with poor drainage soil, increase this to 18–24 inches. The gravel must extend from the base of the wall to the top of the wall, with the top 6–12 inches optionally covered by topsoil. The total width of the base and backfill zone should be at least 18 inches of compacted aggregate (How to Hardscape, 2024)[1]. A wider zone provides more drainage capacity and reduces pressure on the wall.
Do I need a drainage pipe if I use gravel backfill?
For walls under 3 feet tall in well-draining soil, gravel backfill alone with weep holes may be sufficient. However, for any wall over 3 feet tall or in clay soil, a perforated drainage pipe is essential. The pipe should be installed at the base of the gravel backfill zone with a slope of 0.125 inch per foot (How to Hardscape, 2024)[1]. The pipe carries water to an outlet away from the wall, preventing saturation of the gravel zone. Without a pipe, the gravel can eventually fill with water, defeating its purpose. The Home Depot recommends a drainage pipe for “higher walls or areas with soil that stays wet” (The Home Depot, 2025)[3].
What happens if I backfill a retaining wall with dirt instead of gravel?
Backfilling a retaining wall with dirt instead of gravel is one of the most common causes of wall failure. When soil saturates with water, it expands and exerts hydrostatic pressure that can crack, bulge, or topple the wall. Clay soils are especially problematic because they hold water and expand significantly. Even sandy soils can create pressure when saturated. The gravel backfill zone relieves this pressure by providing a drainage path. Without it, the wall must resist the full force of saturated soil, which is often 5–10 times heavier than dry soil. In most cases, a wall backfilled with dirt will fail within 2–5 years, requiring expensive reconstruction.
Gravel Types for Retaining Wall Backfill: A Comparison
Choosing the right gravel type depends on your wall height, soil conditions, and budget. The table below compares the most common options for backfill retaining wall with gravel projects.
| Gravel Type | Stone Size | Drainage Rating | Best Use Case |
|---|---|---|---|
| Crushed Stone (ASTM #57) | 0.75–1.5 inch | Excellent | Primary backfill zone behind walls over 3 ft |
| Crushed Stone (ASTM #4) | 1.5–2 inch | Excellent | Base layer under wall blocks |
| Pea Gravel | 0.375–0.5 inch | Good (with limitations) | Drainage backfill for low walls under 3 ft |
| Crushed Concrete | 0.75–1.5 inch | Good | Budget option for low walls, may contain fines |
Crushed stone (ASTM #57) is the most widely recommended material for backfill retaining wall with gravel projects because it offers the best combination of void space, structural support, and availability. Pea gravel can work for low walls but drains less effectively due to tighter packing. Crushed concrete is a recycled alternative but may contain fine particles that reduce drainage over time.
Practical Tips for a Successful Backfill Project
These actionable tips will help you avoid common mistakes and ensure your retaining wall performs well for decades.
- Compact in thin lifts: Place gravel in 4-inch lifts and compact each one thoroughly. Skipping this step leads to settlement that can crack the wall or cause it to lean forward.
- Use filter fabric on all sides: Wrap the gravel zone in geotextile fabric to prevent soil migration. This is especially important if your native soil contains clay or silt, which can clog the gravel voids within a few years.
- Test your drainage before covering: Before adding topsoil, pour a bucket of water into the gravel zone. It should disappear within seconds. If water pools, check for blockages in the drain pipe or insufficient slope.
- Consider professional grouting for mining applications: For industrial or mining retaining walls where groundwater control is critical, specialized backfill grouting techniques may be required. Colloidal grout plant solutions for mining can provide additional stability in challenging geological conditions.
- Plan for expansion: In freeze-thaw climates, the gravel backfill zone should extend below the frost line to prevent frost heave from pushing the wall upward.
Final Thoughts on Backfill Retaining Wall with Gravel
To backfill retaining wall with gravel correctly is to invest in the long-term stability of your structure. The combination of angular crushed stone, proper zone width, and a well-designed drainage system prevents the hydrostatic pressure that destroys walls. Whether you are building a small garden wall or a large industrial retaining structure, the principles remain the same: drain water away before it becomes a problem. Start your project with the right materials and techniques, and your wall will stand strong for generations.
Useful Resources
- How to Hardscape. Backfilling a Retaining Wall.
https://howtohardscape.com/backfilling-a-retaining-wall/ - Gravelshop. Retaining Wall Aggregates and Backfill Materials.
https://www.gravelshop.com/application-and-uses/retaining-walls-backfill-108.asp - The Home Depot. How to Build a Retaining Wall.
https://www.homedepot.com/c/ah/how-to-build-retaining-wall/9ba683603be9fa5395fab90d68eac94 - Hello Gravel. Pea Gravel for Retaining Wall Base: When to Use It and When to Avoid It.
https://hellogravel.com/guides/pea-gravel-for-retaining-wall-base-when-to-use-it-and-when-to-avoid-it/